Definition of Rough Texture
It is an adjective that describes a surface as uneven or thick; not smooth. Rough texture refers to a less smooth surface, surfaces with this texture are considered more dynamic and have more depth.
Examples of Rough Texture
- Cement
- Oxidized metal
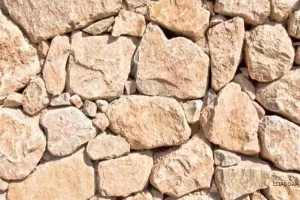
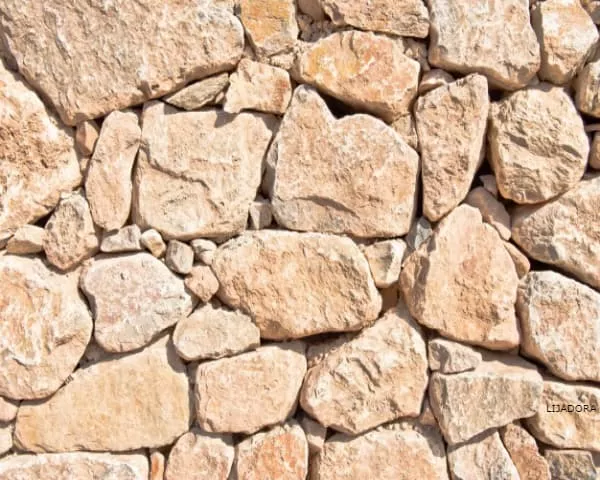
- Bumpy rock
- Rugged corduroy fabric
- Abrasive paper
- Rough Wall Texture
Rough wall textures are commonly used to finish interior wall surfaces and hide gypsum panel seams that are stuck together along with other imperfections. At the same time, these textures transform flat walls into a finish that reflects light and adds interest to any room.
One of the most commonly used rough wall texture styles is: Orange peel (also called splatter or eggshell) looks like the skin of an orange. It is an excellent alternative to a smooth finish because it is subtle but easily hides wall and ceiling imperfections.
It is durable and easy to clean, making it a popular texture in rental homes, commercial buildings and new construction. Its rough, minimalist finish also goes well with most decorations, including modern styles.
Rough Touch Texture
Texture is the character of a surface and can be perceived both tactilely and visually. Tactile texture is the property of the surface that is perceived by touch. It can be rough, smooth, sticky, diffuse, soft or slippery. Tactile texture is the actual way a surface feels when touched. A rough texture is one that, when touched by hand, can feel like a piece of sandpaper or a rock with irregularities.
How to Paint Rough Textured Walls?
Anyone can learn to paint interior and exterior surfaces, although if the texture is rough, the work may be more challenging.
We can use:
Rollers and Roller Covers
If the surface is textured, choose a sturdy lamb’s wool roller cover. The best roller covers have plastic instead of cardboard.
Avoid thin plastic roller frames, which can bend or break when used on rough surfaces. Choose a sturdy metal roller that is reasonably heavy.
Test the roller in your hand before you buy it to make sure the grip is comfortable. Some heavy-duty roller frames are uncomfortable for painters with small hands.
Brushes
Low-cost brushes tend to shed fibers, collect lumps of paint, and even bend or break under pressure.
Look for professional quality brushes with wooden or hard plastic handles. Choose synthetic bristles in a poly-nylon blend if you are using latex paint. Use stiff natural bristles when applying oil-based paint.
You will need a variety of brush sizes to cover all nooks and crannies on rough walls. Choose a selection of brushes from one to three inches in size.
Masking
Runs and drips are always possible during any painting project. When painting rough walls, the chances of drips and spills are much greater, as paint drops can accumulate on the surface.
Completely cover all areas that will not be painted, including windows and floors. Remove all hardware from the walls. Carefully align the edges of windows and other unpainted surfaces with masking tape. Dip the brush into the paint can and wipe off the excess along the edge of the can. It is tempting to apply a thick layer of paint to rough surfaces, but doing so greatly increases the chance of running or dripping.
Instead, use a moderate amount of paint on each pass. Move the brush back and forth and up and down to force the paint onto the textured surface. Use wide brushes whenever possible, choosing narrow brushes only for detailed work.
Lamination
Dip the paint roller into the paint and spread it out on a paint tray or tray rack. Use wide “W” strokes to apply the paint to the wall. You will need to go through each section several times to force the paint onto the lowest points of the textured wall. Start at the top of the wall and work downward, releasing any drips as you go.
Multiple Layers
Rough walls generally require at least two coats of paint for uniform coverage. If you choose a strong color such as red, plan to paint at least three coats. Allow the wall to dry overnight between coats. Inspect each morning in bright light for thin spots.
How to Make Rough Texture ?
A homemade and original idea is to create a rough texture by painting the wall generously and before it dries, pass a straw broom pressing so that it scratches the paint and lets the color underneath show.
If you want to make rough finishes on the walls, the first thing to do is to place a paste on the wall that will be hit or flattened to give it roughness. Any technique should be applied quickly and accurately, before the paste dries, and without stopping to look for a particular effect or drawing, because a non-uniform roughness is more striking.
However, a uniform roughness can be achieved by using a specially designed drawing roller or notched spatula. To achieve a rough dotted finish, a special dotting brush should be applied to the above-mentioned filler layer.
Hitting the paste making a very marked relief effect with which you will get a finish similar to the well-known gotelé, although made in a much simpler and homemade way. It is necessary to be moderate when hitting the paste that receives the wall, because otherwise it could damage or throw splashes throughout the room.
Also, if a lot of effort is put into achieving a very deep dotting, it may not be possible to finish before the paste hardens, especially if the stretch of wall to be dotted is large, which will make the work difficult.
It is also possible to score first and then level the surface. To do this, tap the paste with a thick brush and slightly smooth the protruding paste points by gently sliding a wet spatula over them. A rubber roller can also be used to make large, curved or wavy marks. In this case you can plan the drawing you want to make before starting it.
Finally, with the technique of dragging will achieve an effect similar to the grain of a wood. You will have to pass a rubber roller along the wall, marking the peaks, and then smoothing some areas and marking others using a spatula.
How to Apply a Rough Texture ?
A variety of tools can help achieve a rough texture, such as combs, spatulas and sponges. Wood and plaster can be used as practice surfaces to try out different texturing techniques.
When using the tool, apply an even coat to the surface being practiced. Run the tool over the paint slightly, moving it around in different ways until you find the design you prefer. Then try to dry the paint, but first use a brush, sponge, or crumpled paper ball to create your own design. When you get the desired texture on the practice material, you can apply it to the area you want to texture.
Related Topics

WOOD TEXTURE: What It Is and Its Types

STEEL DENSITY: Definition, Properties and Composition

TEXTURIZED WALL: Modern and Interior Walls

SAND EFFECT PAINTING: For Exteriors and Gotele Type

FERROUS AND NON FERROUS METALS
Other Topics of Interest in ALPHAPEDIA

FREE CUTLERY COURSE

FREE BACHELOR DEGREE IN TATTOO ARTIST

GOD ANUBIS: Who Is ? History and Mythology. The God of DEATH

FREE DOCTORATE IN GRAPHIC DESIGN

FREE BACHELOR DEGREE IN PUBLIC SAFETY

FREE AGRICULTURE COURSE
Rough Texture Image


